Red Thai curry paste

Standard

I based this onthe recipe in the edc but made some adjustments withthe ingredients that I had to hand.

I love fragrant curries. They seem so filling and comforting, yet the zing on your tongue makes the feel fresh too.

I also seem to have developed an addition to coconut. I’ve always liked it, but lately seem to be wanting it more and more!

So I made a batch of this paste, as well as making my own coconut milk from desiccated coconut.

Ingredients

8 medium chillis (mine were from Grandma’s garden, still onthe plant but a bit dry. I just soaked them in hot water, while prepping the other ingredients and scraped out majority of the seeds as I have little kids)

Thumb size piece of ginger
Lots of garlic gloves (I used 6 fresh)
2 tbsp coriander seeds
2 tbsp Ground paprika
3 stalks of lemongrass (the white part only, and remove the really woody end and outer layers)
Lemon rind and juice (I used the zest and juice of 1.5 large lemons)
Oil (again I used rice bran because it’s what I had, but peanut would be good too)

I think traditionally lime is used, but I had lemon so that’s what I put in. It was really pleasant flavored.

Dry roast your coriander for a couple of minutes. The mill on speed 10. I actually couldn’t get mine to a complete powder consistency, but my seeds were really old so I think they may have been particularly dry.

The add remaining ingredients except for the oil. Process on speed 10. D this until you have a paste consistency you are happy with. Mine probably took a few minutes, and scrape down in between. I also added a bit of water to help combine it.

Then, add some oil, speed 4 and drip it in through the lid. I didn’t put much at all so I suspect my paste won’t keep. But that’s fine 🙂

Put it into a jar and cover with oil on top. And you’re done.

The possibilities are so great with a base like this.

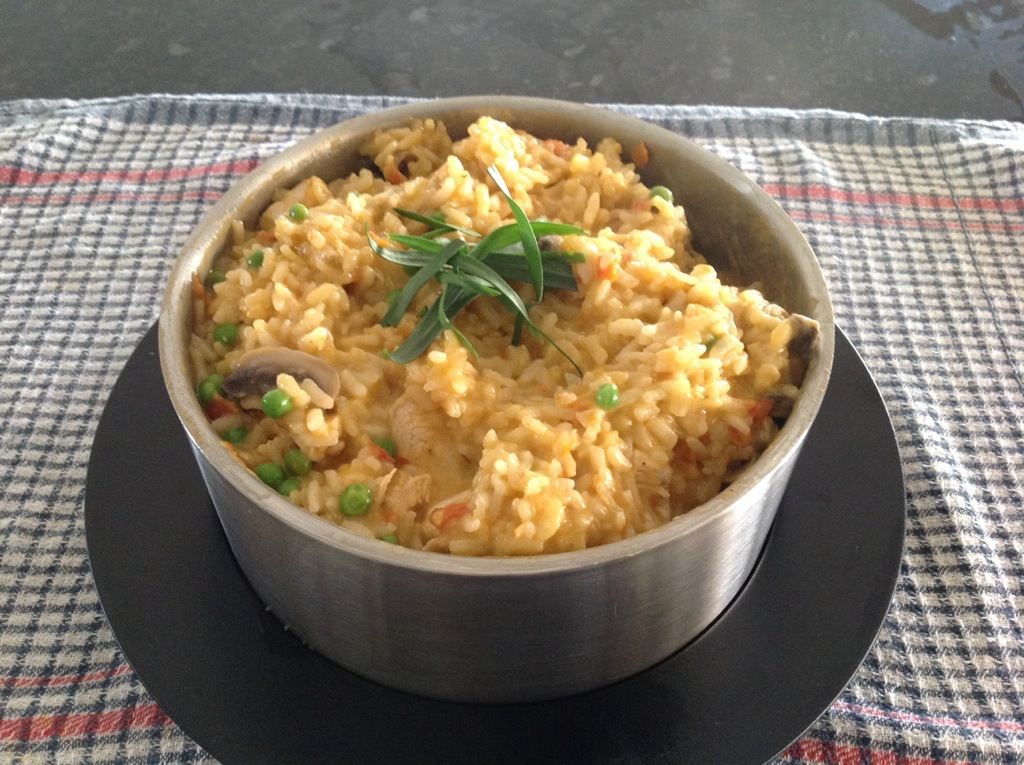
We had chicken curry for tea.
But you could do a vegetarian version with pumpkin and cauliflower.

Or perhaps pumpkin soup with red curry paste and coconut milk?

I also made Thai fish cakes last week and I think this paste would be amazing in them.

Personally I love a mound of fresh coriander with any good, but especially this. Also try adding a spoon or too of peanut butter with your curry.

What are your favourite ways to use a curry paste?

IMG_1114.JPG

IMG_1112.JPG

The Thermomix Epidemic: How To Protect Yourself

Standard
The Thermomix Epidemic: How To Protect Yourself

Have you been infected?

Apparently there is a plague of epic proportions… And I too have succumb to the illness.

Check it out for a good laugh

http://hugzillablog.wordpress.com/2014/08/12/the-thermomix-epidemic-how-to-protect-yourself/

How would you rate your thermomix (or similar affliction) on a scale of 1-10?

I’d say I’m about a 8/10. I love it, I get great use out of it, it saves me time and gives me freedom in the kitchen. I still use my slow cooker and the BBQ.
But that’s ok with me.

When I first bought my thermomix I felt the pressure to use it at every meal, everyday. But now I’m ok with not needing to do that, I see it as another appliance or goods that is a long term investment. So for me I know I will get good value from my thermomix.

They aren’t for everyone, which is cool too.

How do you rate your thermomix infection on a scale of 1-10? Mild cold like symtpoms? Full blown flu?

Lego movie Emmet Bithday cake homemade

Standard

I admit, I don’t go crazy over birthday themes for the kids. I love celebrating them, I prepare for weeks in advance, I enjoy wrapping all the presents.
But making a cake…. Just not high on my list.
So despite the ease of making a cake in the Thermomix, I just really have no desire to do it. So I buy pre made sponge slabs from the supermarket.

After being undecided about what cake the now 5 year old would like, I originally decided to do a basic rocket ship. But, after numerous internet searches, and seeing image after image of phallic like representations I decided that maybe a rocket ship wasn’t the cake for us.

With all things lego being the flavour of the month, I decided to tackle Emmet. I don’t use fondant so it was buttercream all the way.

A very Late night, and with hubby’s steady hand to do the outlines, we got there in the end. At one stage he looked like a prisoner with a combover and really bad hair, hence the thick black mop.

Prisoner Emmet

20140729-094547.jpg

Emmet Template

20140729-094622.jpg

End Result

20140729-094629.jpg

20140729-094635.jpg

Potato and leek soup and Parmesan garlic wheel

Standard
Potato and leek soup and Parmesan garlic wheel

So my eldest turned 5 on Saturday. We had a full on day celebrating with his friends, and the building Lego. So much Lego!
Have you all seen the Lego Movie? Not to give it away, but my husband is rather like the antagonist… He is trying to make Mr 5 build the sets exactly by the book… And them leave them as they are. I don’t think he understands that is virtually impossible for a 5 year old to do.

After a long day we needed a quick dinner. Potato and leek soup… Tick!

I wanted some bread to go with it, but hubby isn’t a fan of the basic whole meal bread. I quick search and I found this recipe from The Road to Loving my Thermomixer (if you haven’t already come across the page in your internet and Facebook travels)

I’m slightly embarrassed to say the entire thing got entirely demolished! Kids loved it, nan loved it, and hubby loved it.

The only difference we had was some Colby cheese also sprinkled on top. I also didn’t add any bread improver.

A quick rundown of the simple ingredients

Bakers flour
Yeast sachet
Olive oil
Salt
Parmesan cheese
Colby or tasty cheese
Paprika
Garlic cloves

The recipe is really simple. The only adjustments I made were to add about 20mls of olive oil to the dough prior to kneading.

I also let it rise for about 20 minutes. I the rolled it and pit it on tray. I popped it into a cold oven which gave a perfect second rise as the oven came to temperature.

20140729-092023.jpg

Chicken Dumplings – Asian inspired

Standard

I have been hearing a lot about yum cha. Never tried it but I am positive it would be just my thing.

So, to try and imagine what it must be like, I gave some steamed dumplings a try yesterday.

They were absolutely delicious, and surprisingly quick to make. The most time consuming part was folding the dumplings, but I’m pretty sure that was the million times I got interrupted by one or more children!

Ingredients (I had. 30 pack of wrappers from the supermarket, but you can easily make your own)

Chicken mince 200 gram
1/4 cabbage
2 spring onions
Knob of ginger
1 egg
Sesame oil
Soy sauce
Fish sauce
Pepper

Method

1. Chop cabbage into chunks. Finely shred or pulse in thermomix.
Put to the side in a bowl, with a sprinkle of salt, let it sit.

2. Add spring onion and ginger to bowl. Chop, 2 sec speed 6.

3. Add sesame oil to bowl, sauté onion and ginger 2 min, speed 1 temp varoma. Give the bottom a scrape.

4. Add remainder of ingredients to bowl, I cook by taste so I probably put around a tablespoon of each sauce ingredient.

5. Using your hands, squeeze out the excess water from your cabbage and add it to the thermomix bowl.

6. Mix all ingredients for 20 sec speed 2. Give it a scrape and mix a little more if not fully combined.

7. I then put a piece of baking paper on my chopping board. I laid about 6 wrappers, dipped my finger in a cup of water and wet each wrap. I the used a spoon to put a small amount of filling in each dumpling. I would say less than a tablespoon as if they are too full they are hard to wrap.

8. I then folded each wrap in half and pinched the sides together. There is no real method to this, just feel it as you go. Basically make sure the sides are all joined. Line your varoma trays with baking paper and place dumplings on2 layers

9. Steam dumplings for approx 12 minutes. This will depend how full your parcels are. I used 500gms waters, preheated to varoma temp. The cook, 12 min, speed 3, varoma temp.

Your serving choices are many. Scoff into the with some soy sauce for dipping, or use them in a soup. You could also fry them too for a crispy morsel.

Let me know what you think

20140702-131632.jpg

Thermomix quick yoghurt UHT LongLife milk

Standard

Yet another eventful morning here. Everyday I wake up wondering what my children will have destroyed with their early waking.
If only I could put bells around their necks. Despite all of our house-securing efforts, somehow they still manage to out smart us. A 4 year old and a 2 year old… I feel like the only parent who has children this mischievous!

So this morning, hubby woke up to the ding of the microwave. Our microwave lives in our laundry. Our laundry has a slide blot on the top of the door. This doesn’t stop my children. They let themselves out the back sliding door, round the entire house, in through the dog door and into the laundry. Where they melted a plastic plate in the microwave, with a mixture they were apparently ‘cooking’. Peanut butter, my entire tub of fenugreek powder, cake decorating balls, soy milk, garlic gloves…

Anyway, one grumpy mummy and daddy later, the house has survived yet another battle, but with scars!

On to today’s post about yoghurt.

It was seriously quick and easy. But you need patience! If you love a peek, like I do, this will take all of your will power. Plan it for overnight or when you are going to be out.

Ingredients:
1 litre UHT milk.
Starter yoghurt (I pick a natural Greek Jalna brand). I like it because it has no other ingredients apart from milk and culture. No artificial thickeners, sugar etc.

That’s it!

To make your yughurt, add your milk and 120gm of starter to thermomix. Mix for 10 minutes, temp 37, speed 3.

Pre warm your thermoserver with boiling water. But you don’t want it too hot, so I usually warm it for a few minutes, the tip the water out with a few minutes to go of the milk cooking.

When it’s done, add your milk to thermoserver. I wrapped mine in a fluffy baby blanket for about 8 hours. I have read that you can leave it for up to 24 hours. The more you can resist temptation to peek the better it will be! Trust me.

There are plenty of recipes to make sweetened yoghurt online if that’s your thing.
Personally, I love marinating some meat in yoghurt. The result is always so fabulous and tender and juicy.
Or I have it with some CADA and honey.

Don’t forget, to keep some yoghurt aside to make your next batch. Each time you make your yoghurt using your starter, your resulting yoghurt will become thicker and creamier each time.

Risotto with chicken and sun dried tomato

Standard

I’m sitting here this Sunday afternoon eating my tea.

Baked potato, not one but 2! Usually I just plate one up, and always end up going back for seconds.
Today I thought, why fight the inevitable, so I dished up 2 from the outset.

I’m pretty sure the reason I love baked potato so much, is that it really is just an excuse to have numerous types of dairy in one bowl. Cheese, butter and sour cream all melted together. What’s not to love?

I’m sure you all know how to bake a potato (happy to share if you don’t)!

A few nights ago we had a risotto dish which I posted to Facebook if you haven’t seen it already here it is. It got thumbs up all around in our house.

Ingredients
1 onion, peeled and halved
1 clove garlic
6-8 sundried tomatoes in oil
Tbsp dried mushroom powder
400gm arborio rice
100gm white wine
2 tbsp vegetable stock concentrate
1 litre water
Sliced mushrooms
2 chicken breasts, cubed
Frozen peas
Olive oil
Parmesan cheese, cubed
Butter

Method.
1. Grate Parmesan cheese, 10 sec, speed 9. Remove to a bowl
2. Chop onion, garlic and tomato, 4 sec, speed 7. Add dried mushroom, and olive oil and sauté for 4 min, speed 1 varoma temp.
3. Add rice. Sauté 3min, speed 1, reverse (or use butterfly), varoma temp. Leave MC off.
4. Add wine, cook 1 minute, speed 1 reverse, temp 100. Leave MC off.
5. Add stock and water, 17 minutes, speed 1, reverse, temp 100. Add chicken and mushroom through MC hole once liquid added and cooking started.
6. I pre warmed my thermo server with water from the kettle, then added my frozen peas. I then added risotto, topped with Parmesan and butter, and let stand for 5-10 minutes prior to serving. Stir before serving.

NOTES:
I use dried shiitake mushroom powder that I buy at the supermarket and grind up to a rough powder.
I’m sure you could let it stand in any bowl with a lit or glad wrap to absorb the moisture and be ready for serving.

20140323-172620.jpg

20140323-172651.jpg

20140323-172658.jpg

Making the big switch

Standard

Hi there,

So things are a little quiet here. But rest assured I do check the blog regularly and it pleases me greatly to see so many of you visiting and (hopefully) finding the recipes and the blog helpful on your cooking journey.

I am embarking on several new journeys myself. A new job, and a new business venture… Can you guess?

I have decided to join as a Thermomix consultant. It wasn’t so much a negative choice for me… I was happy with my BIKM.
But I figured, at a time when I was changing jobs, and have a bit of extra time, why not give it a go? I have nothing to lose.

And here we are! I’m learning new recipes, which I will be sure to inform you all how they go.

And just like a sign confirming I was I the right track… Tonight my toddler got in the cupboard and smashed the lid of my rice cooker. I figure he knew I wasn’t going to need it anymore!

What is new with all of you?
Has anything interesting been cooking?
I’d love to hear from you, and any thoughts on changing machines like I am on my way to, as soon as mine arrives!